POLYWIREUV
A TOOL TO CREATE BETTER UVS EVEN IF THEY BRANCH
UPDATE: PolywireUV is now part of SideFX Labs. Along the way, we improved various things and added new features. So you should go grab from there. I’ll leave this for page up for learning purposes and posterity :-). There still some useful insights.
PolyWire! What a legend in Houdini. A go-to for meshing complex branching structures. But the per-segment UVs & no cap UVs are sometimes a pain! The PolyWireUV HDA tool attempts to solve this problem. Note: This is still in beta. So if you have some trouble (and you’ve set all the settings as best you can) send me other a scene. there are still some known bugs.
It can create:
- UVs that are the best possible for repeating textures.
- UVs that have minimal seams.
- Texel consistent UVs ideal for packing and going into a painting application.
- Lookup attributes on the output mesh so attributes can be transferred from the curve structure (2nd output) back on to the mesh.
- Useful groups for caps and junction points.
Iv’e been wrangling with this one for a while. I hope you enjoy it, and maybe it’ll save some time and help you out in the future. I’ve written some tips to get the most out of PolyWireUV, and I’ve also put some approaches to solve various problems - with a view that the strategies may help you solve other related problems.
Please let me know if you have any issues with the download or the tool, and do reach out and let me know if you’d like me to make or write about something. If you enjoyed reading or found this useful, consider subscribing and follow me on Twitter @DoesCG.
The download and License details found here. Basically it’s free to use :-) and is a full commercial HDA.
USE AND TIPS
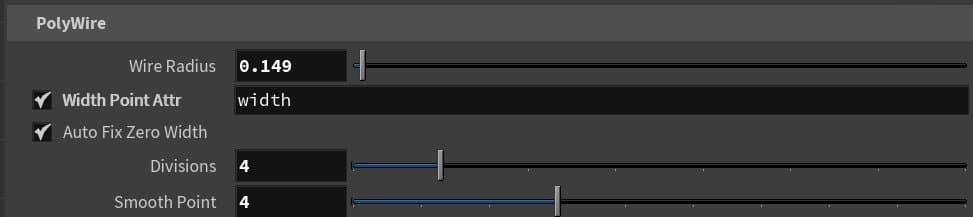
The tool is pretty self explanatory, but I’ve picked out some points that might be useful. You can pretty much use it like a native PolyWire tool in Houdini. A few things are a little different. For example there is a Width Zero Threshold. Width values less than this are treated as zero.
For Painting And Baking
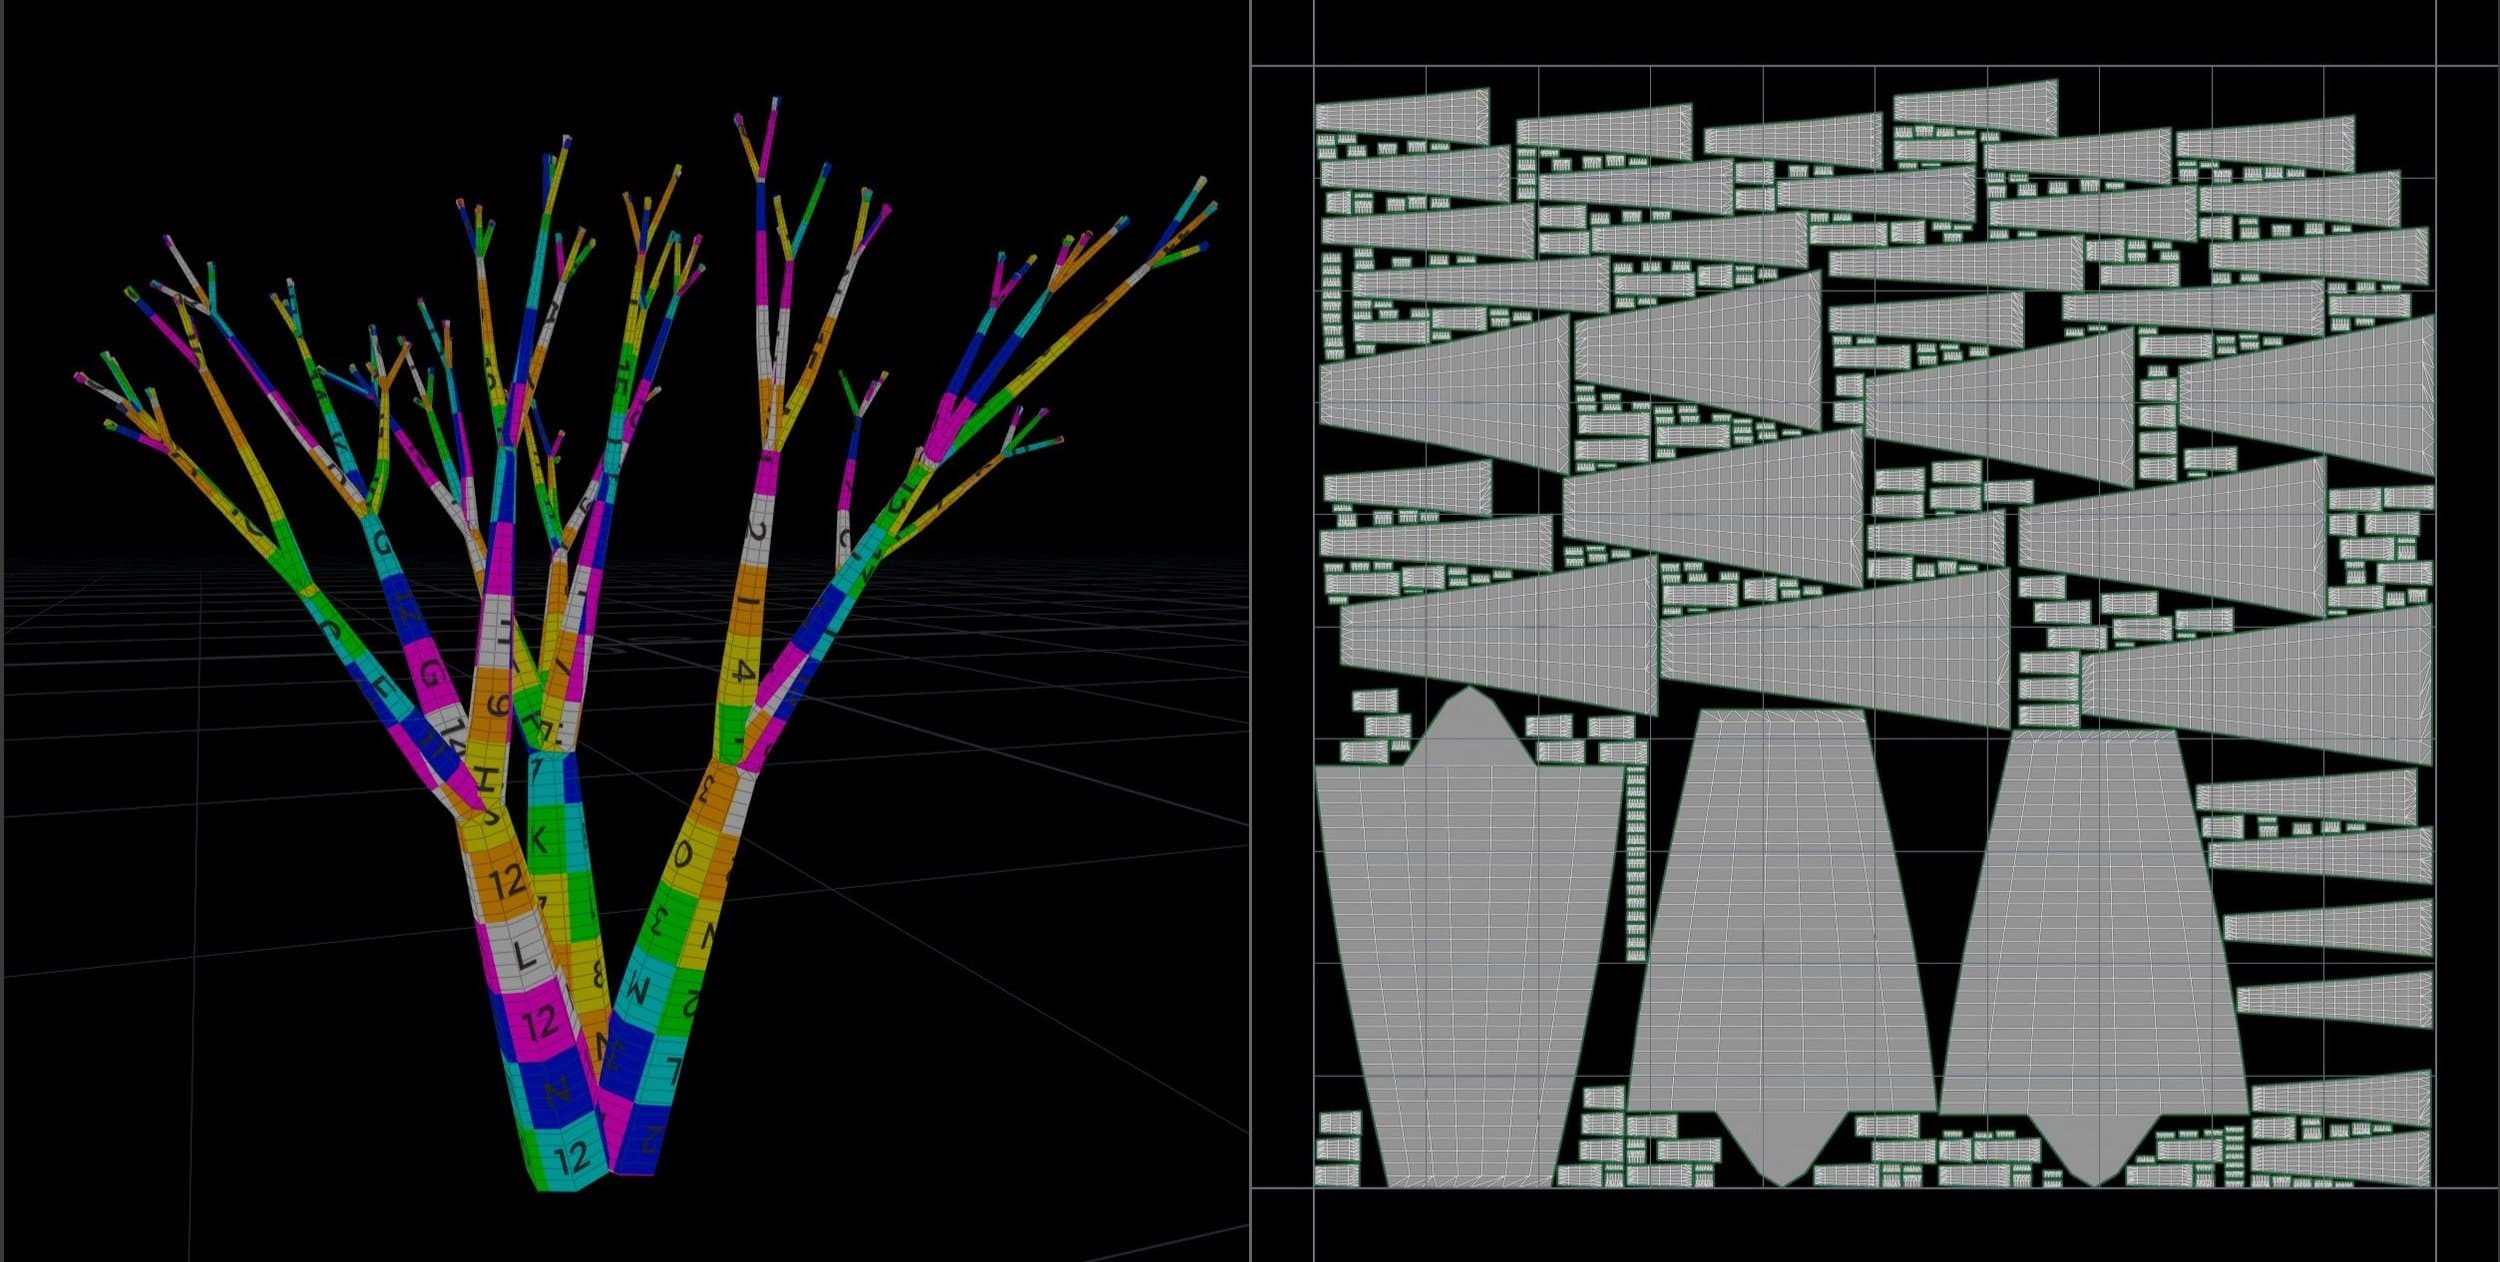
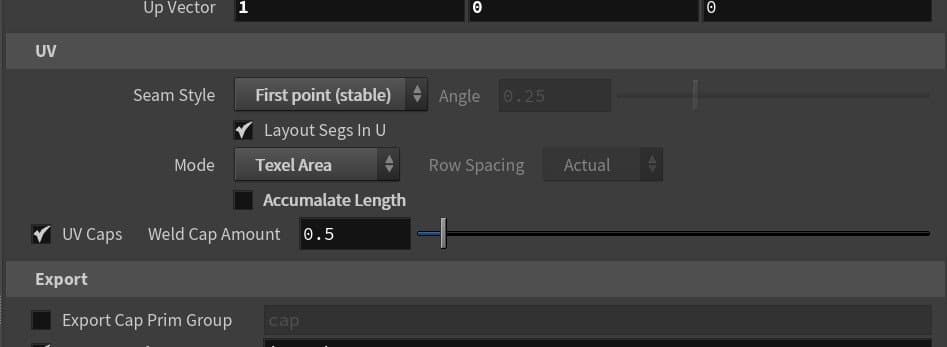
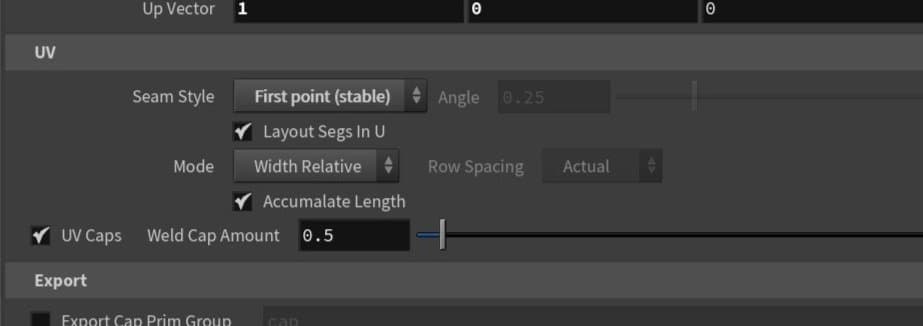
To achieve a good consistent texel density, set the UV section to use Mode Texel Area. Seam style is best set to first point. Then feed the results into a uvlayout node; it’s default setting should work well.
Essentially the Texel Area mode ensures the relative width set and edge length of the curves are compensated to create UVs that closely related to the output mesh’s faces area.
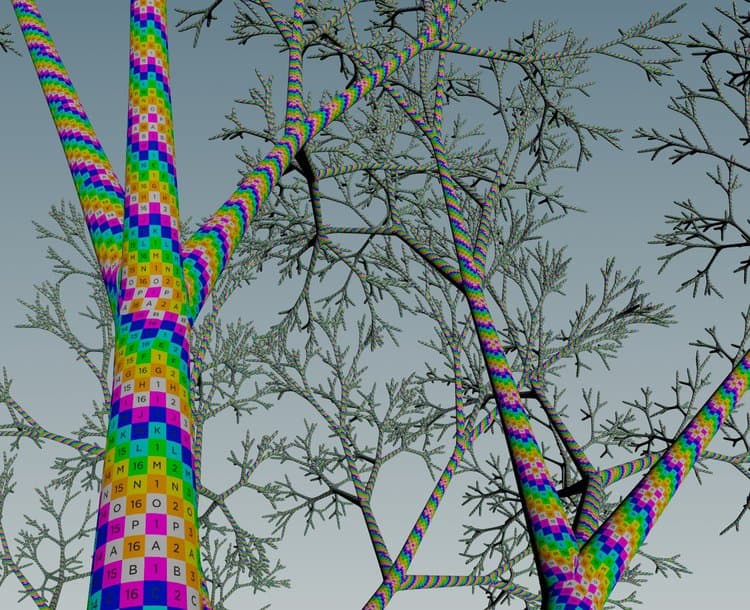
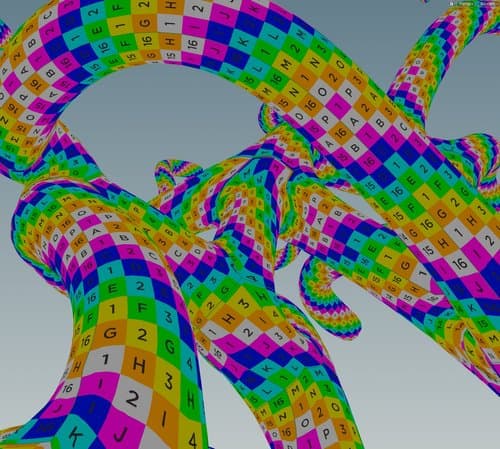
For Tiling textures
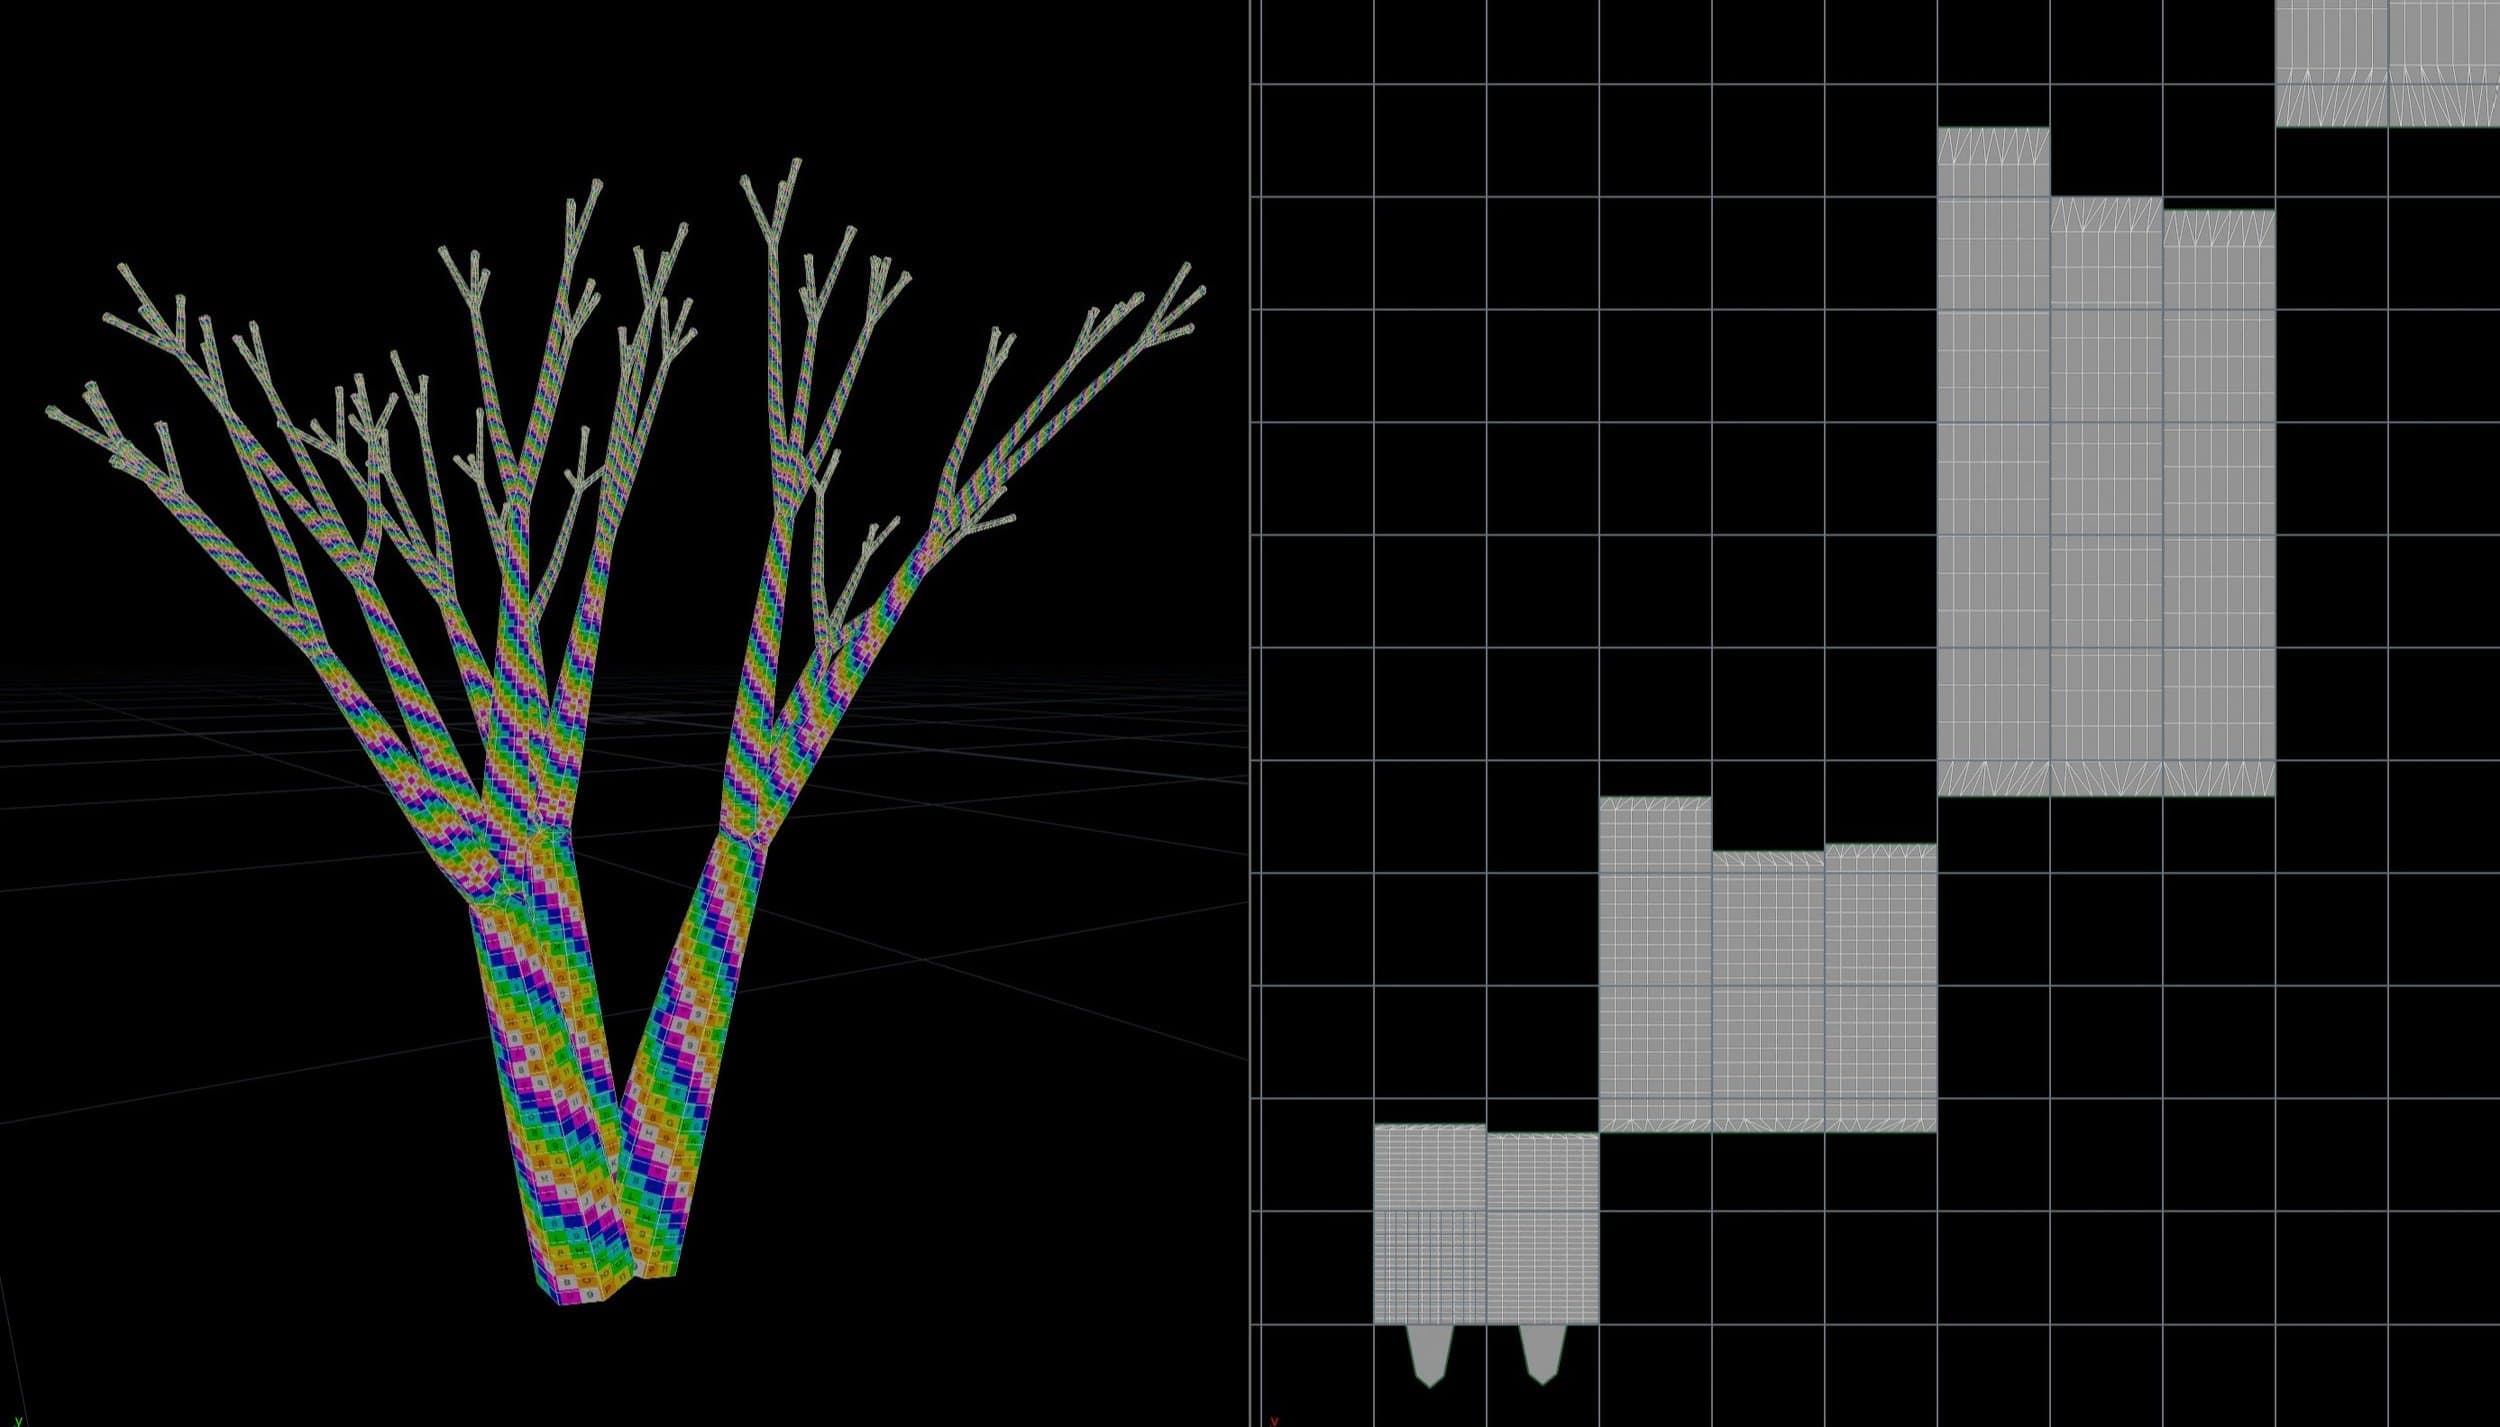
To get textures to tile nicely, set the Mode to Width Relative. It’s important to turn on Accumulate Length, so that every mesh segment picks up from the last, minmising the seam. Depending on the complexity of branching, U seam (horizontal) alignment may differ between segments in some areas. It’s not possible to make some topolgy seamless. You can try setting the Seam Style to Orientated for more control. But this is less robust coping with bad up values - ones where the up value approaches the tangent of the drive curve. Notice the tililng scales nicely with the width. I’ve often noted how say, bark textures can feel elongated if this isn’t done
For Animation
If the curve changes, then the topology and the UVs are highly likely to change. However, PolyWireUV exports lookup attributes on the output mesh that can be used to transfer information from its restructured output curve - the second output. Therefore the input curves can be static and the output curves can be animated, and utilising the lookup attributes the mesh can be deformed or altered.
Using the prim_u and prim_id with the primuv VEX method is particularly powerful, as the curves can be resamples or re-divide and the lookup will work - just as long as the prim order does not change on the curves. In the above example, I’m animating attributes on the restructured curve and looking up the results and applying them to the mesh. M Much faster than recreating the mesh every frame!
Minimum Width
The tool use then connections of geometry to work out the rows of geometry and unwrap the UVs. When given zero width the, points are still created, but with bad connections and topology that makes it impossible to infer the UVs. Auto Fix Zero Width fixes this behind the scenes. One disable this and specify a minimum width manually by un-toggling and setting the manual feed. This is not recommended.
APPROACH
One can relatively easily create an attribute that accumulates along the length of a curve - for example using a UvTexture node set to Uniform Spline as texture type. But how do we get this on the output mesh to form one of the texture coordinate dimensions? Let’s call this attribute V. We need to create a vertex ID attribute on the mesh, so we can lookup the right vertex on the curve. The problem is that PolyWire does not propagate vertex information through from the input curves.
But it does propagate point attributes! Here are the steps I take to achieve this:
- Restructure the curves so that each primitive has its start and end vertex that is either a junction, a start, or end point in the edge network.
- Ensure there is at least one point in the primitive that is not a start, end, or junction point.
- Create an array attribute on the points of the input curves that contains all the vertices that are attached to each.
- Mesh the curves with the PolyWire. The array attribute propagates through to the mesh.
- Promote the array point attribute on the output mesh to vertices.
- For vertices with two vertices in their list, use the first one. These will be vertices associated with points that are not junction points on the input curves. Therefore, both vertices on the input curves will have the same V value. However, vertices associated with junction points will be ambiguous, as the vertices will have different V’s - they could be either the start of one prim or the end of the other. With the ambiguous vertices associated with junction points, we need to do more.
- Loop over the vertices that share the primitive in the output mesh. If they are not an ambiguous vertex, use their vertex ID attribute to lookup what primitive of the input curve it belongs to.
- For each ambiguous vertex, loop over its vertex ID list, getting the input curve primitive of each. When this matches the previous primitive number found at step 7, we have found our vertex to lookup.
You can see why it is essential to have at least one unambiguous vertex per curve primitive now! Now we have this vertex ID lookup we can find any value on the input curves accross points, primitives and vertices. This was the key to the whole problem.
Interested to find out more? Have a dig around and see if you can work out how I solve the U coordinate.
Please consider subscribing if you’d like to keep updated with what I’m up to or follow me on Twitter DoesCG.
FURTHER READING
Points and Verts and Prims - Great overview of how points, vertices and primitives relate to each other from the legendary CG Wiki. Essential to understand the working of this tool.
Jake Rice has spoken a bit around the meshing branching structures. Hi LA Hug talk can be found here. And a link to a page on his own approach to meshing branching edge networks can be found here.
##UPDATES 19.00 GMT 2021-12-26, version 0.6
- First release.
14.00 GMT 2021-12-27. version 0.7
- Fixed zero min width issue.
- Improved default values of cap weld.
- Improved calculation of length for Texel and Relative modes.
- Removed Group selection. Split off what you want to PolyWire.
19.00 GMT 2021-12-31 version 0.9
- Improved stability.
- Fixed cap scale issue.
- Multiple networks now work.
- Implemented compile blocks where possible.
20.00 GMT 2022-01-02 version 0.92 - Hotfixed max iterations safety. 21.00 GMT 2022-01-08
- Large optimisations in walk U speed. 300% to 400% speed increase.
- Interface tidied - UV mode UI adapts to settings.
- Deprecated seam orientating.
19.00 GMT 2022-01-12 version 0.99
- New auto aim up.
- Snapping V for vertical tiling to non parent.
- Cap fixes around texel mode
14.00 GMT 202-04-01 - Dev made private and moved to SideFX Labs.