TAB TOOLS - BREAK DOWN THE MONOLITH
A MONOLITH - JUST A BUNCH OF CHIPS AND CHUNKS STUCK TOGETHER!
In Houdini, often overlooked but used so much, custom Tab Tools are incredibly useful.
Every time you create a node through the Tab Menu, you are using one. Sidefx uses them extensively to configure setups and create networks of component nodes.
Vellum Constraints, For Blocks and all manner of DOPs setups. All built out of a few low-level nodes wired in a specific ways to create many networks to solve numerous problems.
Over the years, I have noticed the absence of this strategy from TD’s. This has to led many creating “monolithic” tools where everything - including the kitchen sink - is bundled into one Uber Node Type.
Components that would be useful by themselves become hidden deep in the noodle undergrowth inside the tool, and as the UI bloats, large portions of it hang around like a bad smell waiting for a specific circumstance to dissipate.
This tutorial will walk you through how to create your own - in Houdini speak - “Tools”, and hopefully encourage you to consider how your HDAs could be more modular, user friendly, and easier for people to understand.
I tend to group these smaller components into “Suites” of HDAs, usually all living in one HDA library. Parts are all versioned and tested together as they often rely on close interactions.
The run-through below assumes that you have some experience in:
- Python
- Houdini in general
- HDA Creation
There’s also a handy download to a HDA where you can carefully inspect the code and the settings.
Some links can be found in the Prior Reading section if you feel you need some more experience before tackling this.
THE DEFAULT TOOL
Lets make a quick HDA Sop.
Pop open it’s Operator Type Properties Window.
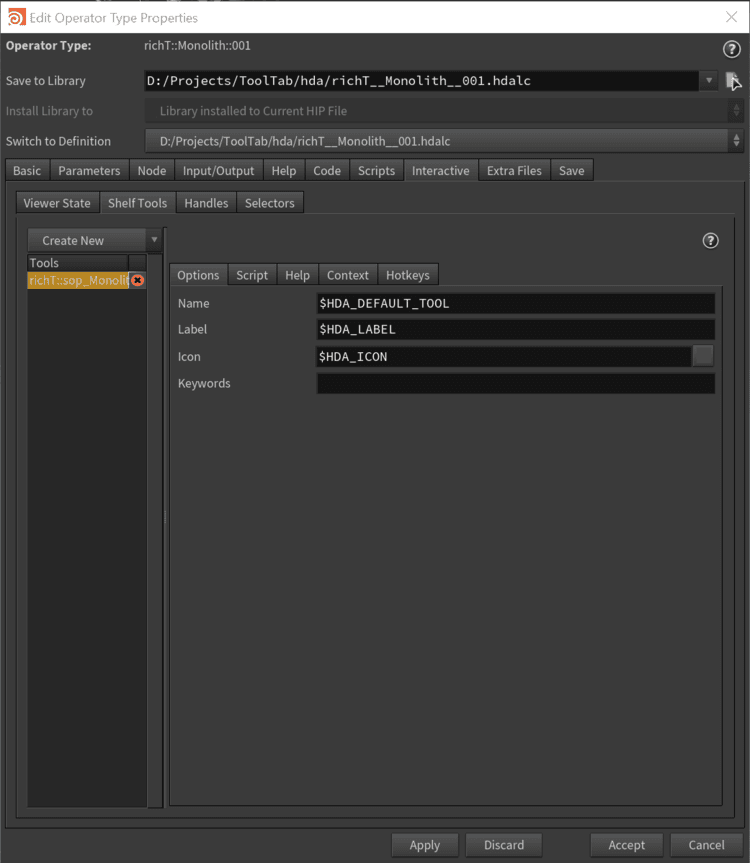
Here it is - that little default Tool that allows your HDA to be created from the Tab menu - right there in every HDA you make…
Everything that controls it is under the Interactive tab/ Shelf Tools tab.
Slide 1 shows the actual name of the Tool, the Label - as it will appear- and the Icon it will use.
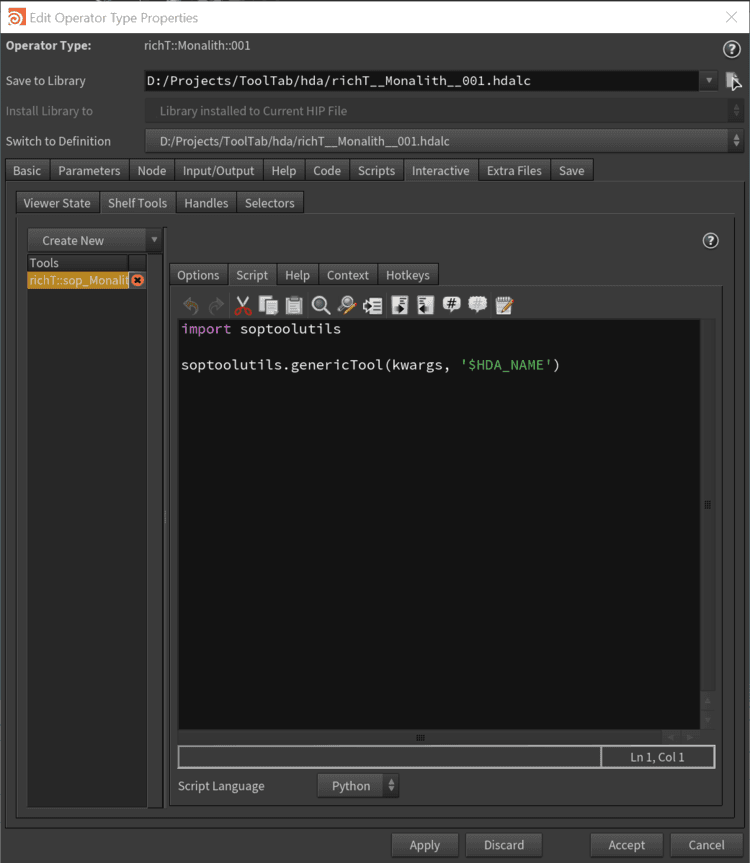
Slide 2 shows the script that is ran when the Tool is activates. Notice:
It calls a method supplied with Houdini - soptoolutils.genericTool
A set of Keyword Arguments are passed to that method via kwargs. This is supplied by default - it is not created from within the HDA.
The availability of variable $HDA_NAME, which expands to give the HDA Node Type’s name where the Tool is defined.
LET’S MAKE OUR TOOL!
In the Operator Type Properties window, click Create New, then click Tool.
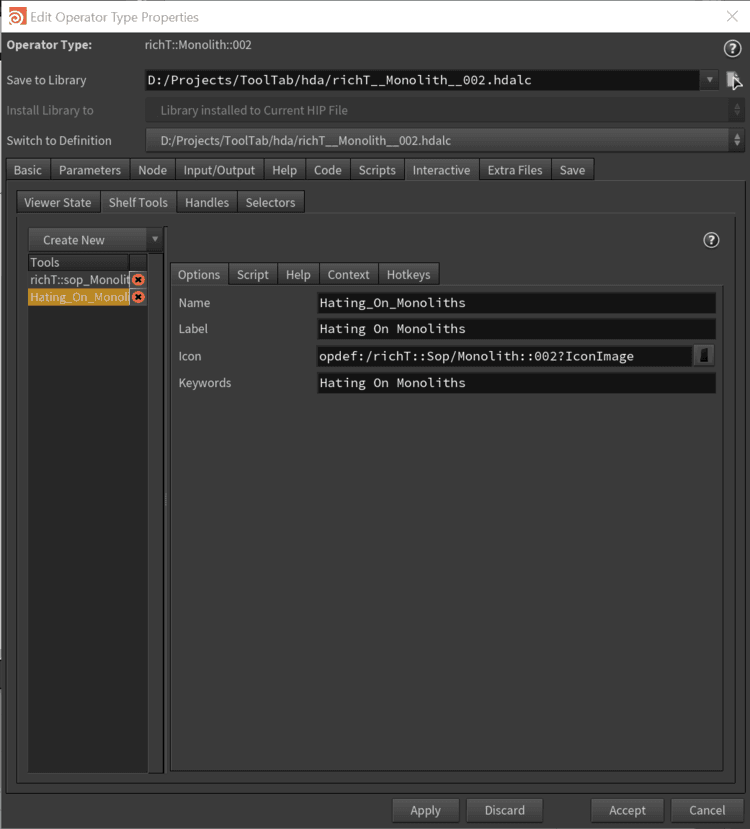
Fill out the “Name”, “Label”, “Icon”, and “Keywords” - the words that if you type will filter this Tool. See Slide 1 in the next set.
Time to test it out. In SOPs, in a Network Editor, hit Tab and start typing “Hating”. You should see the Tool “Hating on monoliths” appear.
Click it. And… it does nothing. That’s because we need to tell it do something!
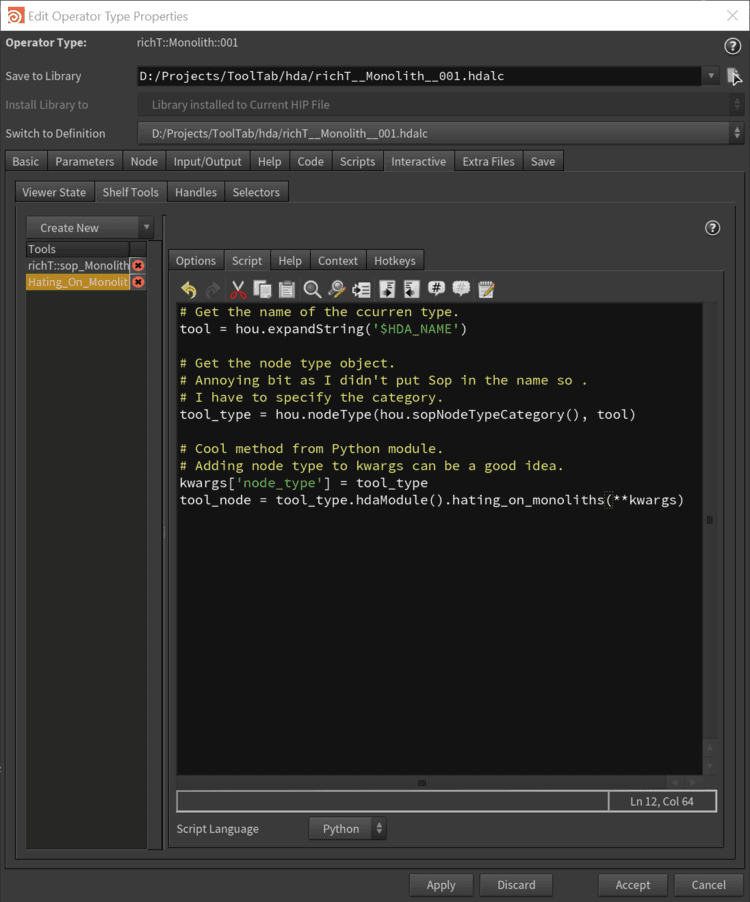
In the Operator Type Properties window go to Interactive/Shelf Tools/Scripts.
And smash this in there:
# Get the name of the current type
tool = hou.expandString('$HDA_NAME')

# Get the node type object
# Annoying bit as I didn't put Sop in the name so
# I have to specify the category
tool_type = hou.nodeType(hou.sopNodeTypeCategory(), tool)

# Cool method from Python module
# Adding node type to kwargs can be a good idea
kwargs['node_type'] = tool_type
tool_node = tool_type.hdaModule().hating_on_monoliths(**kwargs)
You can skip my comments that’s just me trying to be helpful!
So what is this code doing? It is expanding the $HDA_NAME and deriving the Node Type Object of the Type. I then use this to point towards a method defined within the HDAs Python Module - that method is hating_on_monoliths. So lets code that method.
Go to the Scripts tab - not the one in Shelf Tools - the other one, up a level and to the left of Interactive.
Type:
def hating_on_monoliths(**kwargs):
    print('Haters going to hate...')
    print(kwargs.keys())
Click Apply.
Ok you should have something like these images:

Ok lets test it out again. In a Network Editor hit Tab and type “Hating”. Click it.
Something should happen. You should get a print out of the our “Hating” message as well as list of the wonderful keys in the keyword argument (kwargs), all of which we can utilise…
whoooop!
LET’S HAVE SOME FUN
So that’s all you should need to rock this thing... apart from the Gotchas - you probably want to read that one! It’s at the end.
I went on to extend the method to create the Gif at the top, and make a dummy Chip and Chunk HDA.
Here’s the code I ended up with:
import toolutils

def hating_on_monoliths(**kwargs):

    # Get the pane
    pane = (kwargs['pane'])

    # Get location. Compensate for a Network Editor not being the Pane it was launched from
    if(pane == None):
        parent = toolutils.networkEditor().pwd()
    else:
        parent = pane.pwd()

    if isinstance(pane, hou.NetworkEditor):
        position = pane.cursorPosition()
    else:
        try:
            netEd = toolutils.networkEditor().cursorPosition()
            position = netEd.cursorPosition()
        except:
            position = hou.Vector2(0, 0)

    # Make nodes and sarcastic comments
    chip = parent.createNode('richT::Chip')
    chip.moveToGoodPosition()
    chip.setColor(hou.Color(1, 0.5, 0.25))
    chip.setGenericFlag(hou.nodeFlag.DisplayComment, True)
    chip.setComment('I was made by a custom tool in the tab menu defined in a HDA.'
    '\nAutomate simple setups, and keep your HDAs simpler and more modular.')
    chip.setPosition(position)

    chunk = chip.createOutputNode('richT::Chunk')
    chunk.move((0, -1))
    chunk.setColor(hou.Color(0.5, 1.0, 0.25))
    chunk.setGenericFlag(hou.nodeFlag.DisplayComment, True)
    chunk.setComment('I\'m a little re-usable bit of what was in a monolithic tool. '
        'I\'m only needed in specific situations within the tool. '
        'Sometimes I\'m useful just by myself.')

    mono = chunk.createOutputNode('richT::Monolith')
    mono.move((0, -1))
    mono.setColor(hou.Color(1.0, 0.25, 0.5))
    mono.setGenericFlag(hou.nodeFlag.DisplayComment, True)
    mono.setComment('Now I don\'t need to be so complex! '
        'Oh look my interface isn\'t a maze any more. '
        'Oh and I bet people will find ways to use my parts in ways I didn\'t imagine.')
This script creates a network of HDAs that are all defined as a single HDA library to simulate how a monolithic HDA could be broken down install smaller components that work together.
ADDING TO A SHELF
Like to add the Tool you’ve created to a shelf? Right click on a shelf, and click Edit Shelf Tab and your Tool should show up in the Tools tab. Set the options, select it and hit Apply. Sometimes it doesn’t show up straight away. A Houdini restart can help. Not sure exactly why this is.
GOTCHAS
One needs to know where to create nodes ( if indeed you are creating them), and the way to do this is getting the Pane. The eagle-eyed will notice this script will error if no Network Editor exists!
If your script only works in a certain context - our case SOPs - then you should use Interactive/Shelf Tools/Context to limit where the Tool will appear.
Also Houdini will not like Tools named the same. I highly recommend using namespaces to help avoid this.
As I mentioned previously, I tend group smaller components into “Suites” of HDAs usually all living in one HDA library. As they can tightly rely on each other, this helps to test and version the component HDAs at once and release them as one set or suite.
CLOSING REMARKS
Give it a go. It’s worth the effort to get used to using Tools. You can download my example HDA below to help you along.
Hit a monolith hard enough, you’ll find it’s just a bunch of Chips and Chunks stuck together!
And remember, you can have a ton of Tools defined in a HDA, all setting up very specific networks and settings!
Download the Suite below for a closer look.
I had fun writing this article, I hope you had fun too.
Please let me know if you have any issues with the download or the article, and do reach out and let me know if you’d like me to make or write about something.
If you enjoyed the article consider subscribing and follow me on Twitter @DoesCG for more.
PRIOR KNOWLEDGE
Introduction to digital assets (sidefx.com)
Creating a digital asset (sidefx.com)
FURTHER READING
Customize the shelf (sidefx.com) Handy bit shows how to add a hotkey to trigger a Tool.